- Step #1 - Login to your Customer Account
- Step #2 - Download the Installer File
- Step #3 - Find your Installer File
- Step #4 - Accept the License Agreement
- Step #5 - Install Process - drag folder icon
- Step #6 - Choose the "Replace" option when installing.
- Step #7 - Install the PDF Printer
- Step #8 - Open the Program File
- Step #9 - Existing RealData files
Step #1 – Login to your Customer Account #
Login to your customer account at https://shop.realdata.com – Look for the “Sign In” link in the center of the footer of any page.
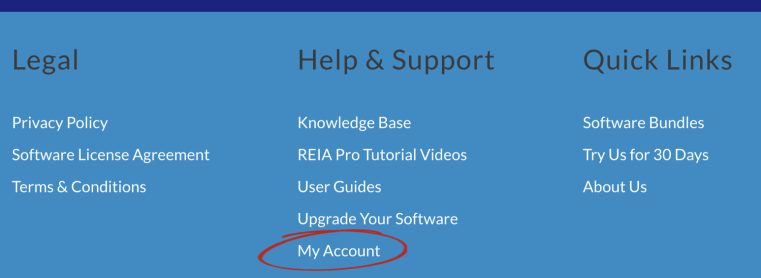
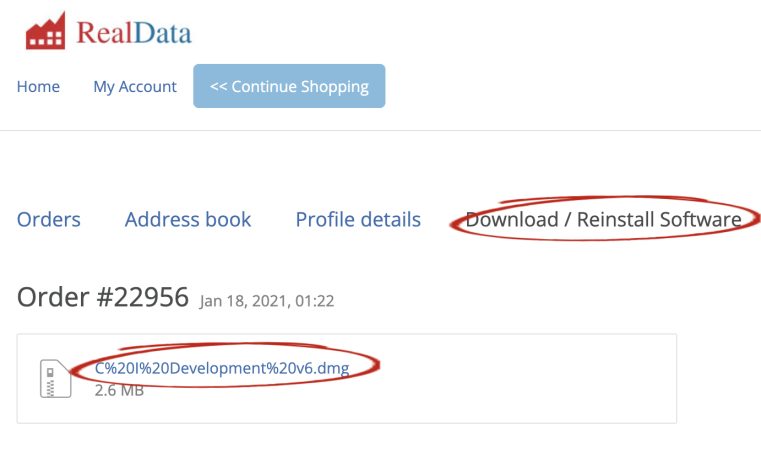
Step #2 – Download the Installer File #
Once in your account, click on “My Account” then “Download / Reinstall Software” tab.
Click on the product link which ends in “.dmg” The installer file downloads. (click image to view larger)
Step #3 – Find your Installer File #
Find your installer file in the Downloads folder. Double click the file to launch the install process.

Step #4 – Accept the License Agreement #
Accept the license agreement.

Step #5 – Install Process – drag folder icon #
A new window appears. Drag the folder on the left to the Applications folder on the right. This installs your software in the Applications folder.

Step #6 – Choose the “Replace” option when installing. #
If you have previously installed the product, you will be prompted to overwrite the existing product folder. Choose “Replace”

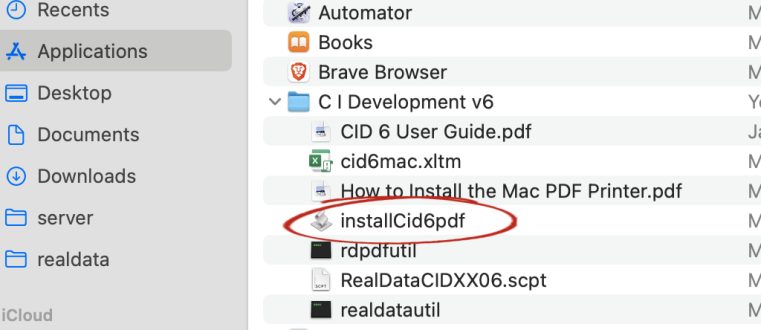
Step #7 – Install the PDF Printer #
Click on the “install” file in the product folder – the file name always begins with the word “install” followed by the program name / abbreviation.
You only need to do this once! When the install process is complete, you will get a confirmation message.
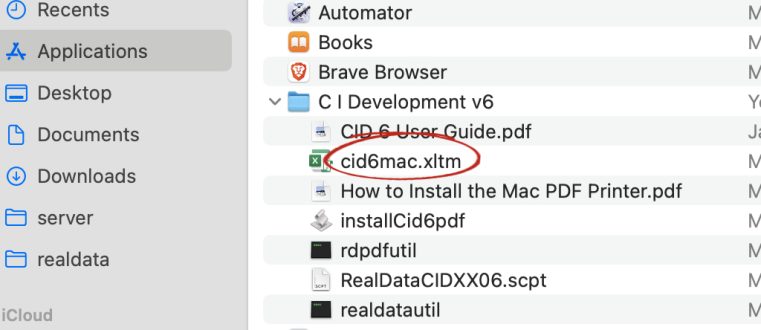
Step #8 – Open the Program File #
Click on the Excel file in the product folder within the Applications folder to launch the software. Look for the green Excel icon.
Step #9 – Existing RealData files #
Any files that you have already created using our software are NOT affected by the upgrade. Only the blank master file gets updated.
If you have REIA Pro or Personal Financial Statement, you can use our “Import” tool to copy the data from an existing file into the new master template. View instructions here for REIA Pro and for Personal Financial Stmt.
For other programs, you will need to manually copy over the data from the older file to the new template.